Nighthawk extender setup
WiFi range extenders are very useful devices that greatly improve and extend the existing wireless network range anywhere. When the Netgear Nighthawk extender setup is finished, you will have fast and continuous internet access throughout your home.
If you are unfamiliar with the installation and configuration of a Netgear WiFi extender, Then contact our technical team by dialing our toll free number +1-323-471-3045 for free assistance.This article will teach you everything you need to know about Netgear WiFi extender setup. It is recommended that you bookmark this article so that you can easily seek assistance if you encounter any problems during the Netgear Nighthawk setup process. Let’s go with the process.
For Netgear Nighthawk extender setup go through these steps:
- Take out your Netgear Nighthawk extender from the box and turn it on.
- Get on a wifi enabled device and get connected to the extender network.
- Once it is done, the device LED will give stable green light.
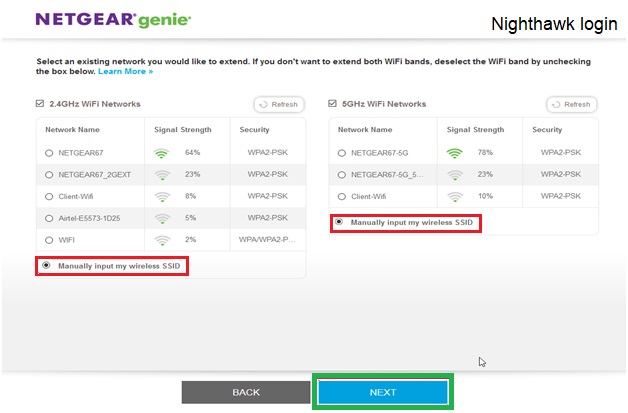
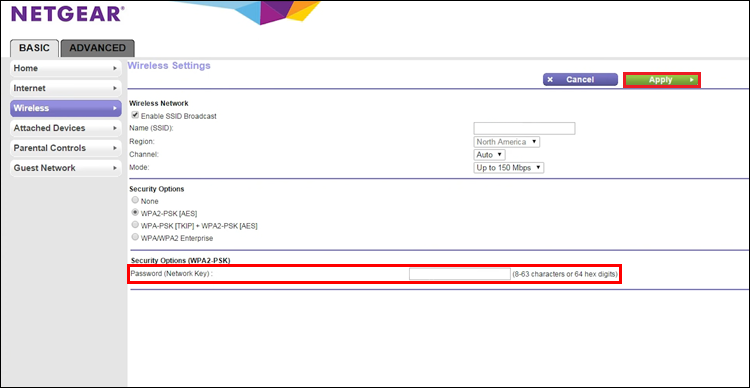
- Go to www.mywifiext.net setup wizard in any web browser.
- Now the Netgear Installation assistant page can be seen clearly.
- To connect your repeater with the existing network,follow all the prompts.
- Once done, the LEDs will turn solid green on the booster.
- Now you can unplug the repeater and place it at a new location with poor or no signal.
- Connect your other wifi enabled mobile devices like smartphone,desktop, laptop, or a tablet to the extended network.
Netgear Nighthawk extender login
Here’s the steps for the Netgear Nighthawk extender login:
- Grab any wifi enabled smart device.
- Get connected to the Netgear_EXT network.
- Launch any web browser of your choice.
- Visit www.mywifiext.net.
- Click on New Extender Setup.
- Type your personalized details to create your account.
- Follow the prompts to complete the process.
In this way you can log in to your Netgear Nighthawk wifi extender.
How to do a Nighthawk extender setup using the nighthawk app?
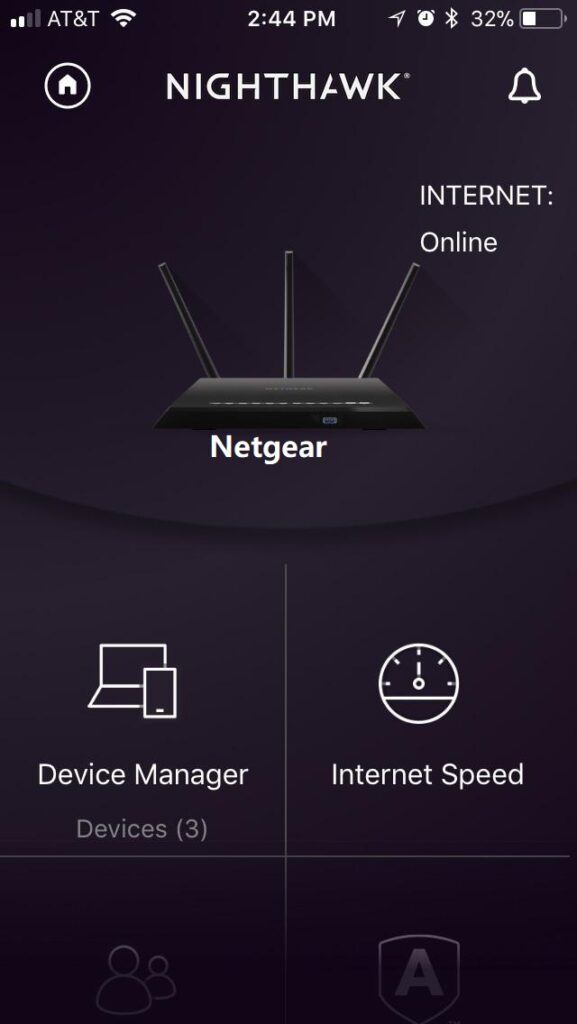
The Nighthawk app can also be used to perform the Netgear WiFi extender setup. There is no need for a PC or laptop to use the app for new extender login and setup. You only need a mobile device and your Netgear extender!
You can run the Netgear Nighthawk app on both Android and iOS devices. The following are the instructions to perform Netgear Nighthawk extender setup using the Nighthawk app:
- Grab your any mobile device.
- Install the nighthawk app.
- Navigate the wireless option on your mobile device.
- Get connected to the Netgear_ext.
- Go to the nighthawk app.
- In order to complete the setup procedure follow the on-screen prompts.
- Now move your extender to use it at a place with poor connection.
How do I perform Nighthawk Extender setup using WPS?
Now let’s get familiar with another way to setup your Nighthawk extender i.e. the Wireless protected setup (WPS) which is considered as the most easiest and fastest way to configure your extender. You are able to complete the whole configuration within two minutes only when you perform Nighthawk Extender setup using WPS method.In this blog we will give you the whole step by step information about this procedure.
To perform the Nighthawk Extender setup using WPS follow the given instructions:
- Plugin your Nighthawk extender into a proper power supply
- Make sure that your booster and the router should be in the same room.
- Wait until the LED turns solid green.
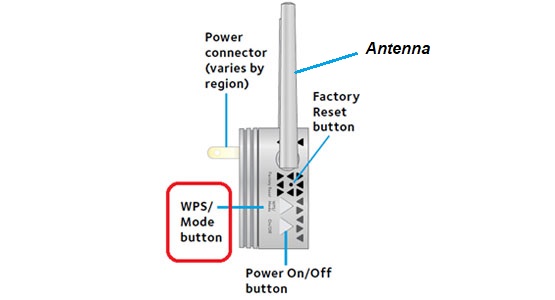
- Locate the WPS buttons on the repeater and the home router.
- Press the WPS button on the Nighthawk extender and on the router too.
- Wait for the light status to become solid green.
- Once it gives the solid green light move your repeater to a new location.
- You can now connect the rest of your devices to the network.
How do i setup my Nighthawk extender using www.mywifiext.net?
Let’s get introduced to another way to configure your extender. You can set up your Nighthawk extender using www.mywifiext.net, or you can do it by web browser setup. You must have a wifi enabled smart device such as a desktop, laptop, tablet, e.t.c. Let’s get more into this.
To setup Nighthawk Extender using www.mywifiext.net, follow the given steps below:
- Power on your Nighthawk extender.
- Position your extender near the router.
- Wait for the stable green light on your extender.
- On a smart device,launch any web browser.
- Visit www.mywifiext.net to open Netgear Installation Assistant.
- Follow the on screen prompts to proceed with the setup process.
- Once it is done, place your booster in a new location.
- Now you can connect your other wifi enabled devices.
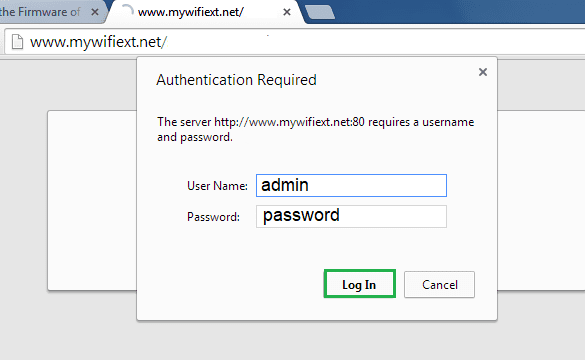
What is Nighthawk extender’s default username and password?
In case a user forgets his username or password for his Nighthawk extender, the default username of your Nighthawk is admin, and the default password is password. But most of the time, a user creates his own username and password.
In the below given steps, we will guide you on how to retrieve your existing credentials:
- First, get connected to the extender’s network.
- Open a web browser and go to www.mywifiext.net.
- If you know your username and password, then well and good.
- If not, then answer two security questions; it will show your username and password.
- If you are not able to remember those security questions,then you need to perform the factory reset operation.
How to reset the Nighthawk extender?
If you have forgotten your username and password or want to retrieve them, then you have landed at the right place. In order to retrieve your username and password, you will have to reset the Nighthawk extender. The factory reset operation prepares your extender for the new installation process by deleting all the personal information, including your username and password. In this blog, we will guide you through the factory reset operation.
- Power on your Nighthawk extender.
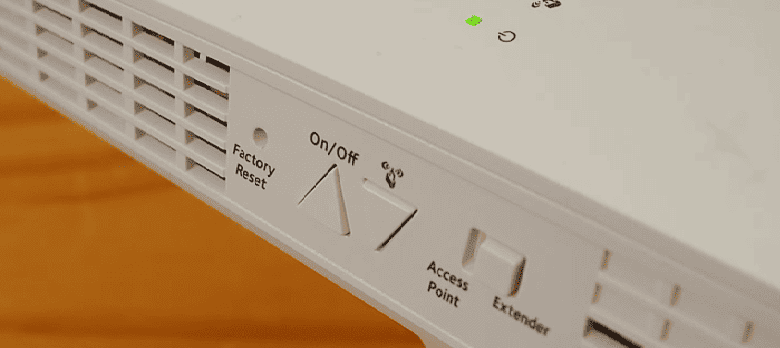
- Locate the factory reset button behind a small hole.
- It might be seen on the side of the extender.
- Take a hard pin or a paper clip.
- Put it into that hole and press it for 9-10 seconds.
- Now release it gently.
- You have successfully performed the factory reset operation.
In case if you are still facing any trouble in any step, just get in touch with one of our technical experts for free assistance by dialing our toll free number +1-323-471-3045 or also via live chat. They are available 24*7 to help you and fix your problem.