Configuring Netgear EX7700 Extender is a process of installing a powerful and advanced wireless extender that can improve the coverage and speed of your existing WiFi network. With the help of cutting-edge technology, this extender can establish a reliable wireless connection even in spots with poor or nonexistent signal. Connecting the extender to your current WiFi network, setting up the extender settings on a web browser, and placing the device where the wireless signal will be as strong and as fast as possible are all steps in the setup procedure. Because of how user-friendly and intuitive the Netgear EX7700 setup is made, users may complete the installation procedure fast and effortlessly.
What is the Netgear EX7700 WiFi Range Extender?
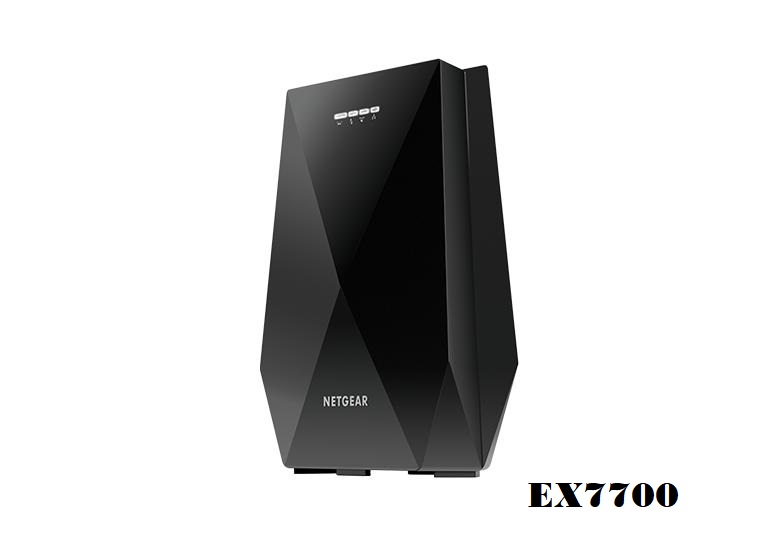
The Netgear EX7700 is a powerful WiFi range extender designed to boost your existing network’s coverage and performance. It is perfect for large houses, offices, or locations where the WiFi signal is poor or nonexistent and works with any normal WiFi router. With the EX7700, you can enjoy seamless connectivity and eliminate frustrating dead zones.
There are two methods for Netgear EX7700 Extender Setup:
Manual Method
WPS Method
Netgear EX7700 Extender Manual Setup
Perform the following actions to configure a Netgear AC2200 extender:
- The extender should be connected to a power outlet in the same space as your router.
- Wait for the extender’s power LED to turn solid green.
- Join the wireless network of the extender to your computer or mobile device.
- In the browser’s address bar, type 192.168.1.250 or mywifiext.net.
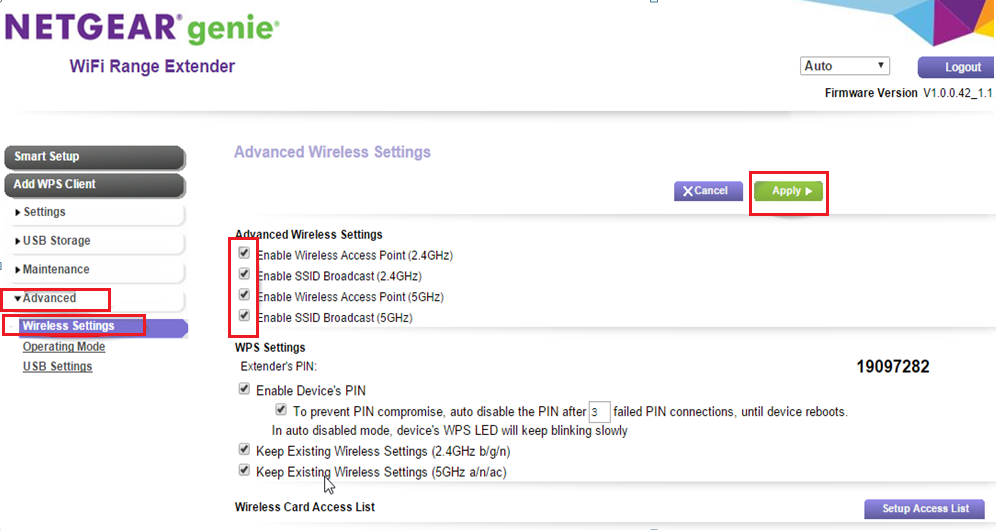
- Follow the on-screen instructions to configure the extender. The extender’s wireless network will require you to select a network name and password.
- After configuring the extender, place it between your router and the spot where you need enhanced Wi-Fi coverage.
- Check the extender’s signal strength using the LED indicators on the front of the device.
- If necessary, adjust the extender’s location or move it closer to the router until you get a strong signal.
Netgear EX7700 Extender Setup using WPS Method
The Netgear EX7700 Extender can be quickly and easily configured using the WPS method in the following steps:
- Power on your Netgear EX7700 Extender and place it within range of your existing Wi-Fi network.
- Press and hold the WPS button on your Netgear AC2200 Extender until the LED lights start flashing.
- Press the WPS button on your current Wi-Fi router in two minutes.
- Wait for the LED lights on your Netgear EX7700 Extender to stop blinking and become solid.
- Your Netgear EX7700 Extender is now successfully connected to your existing Wi-Fi network.
In case if you are facing any trouble with the WPS setup procedure you can directly reach our technical experts by dialing our toll free number or also via live chat.
Table of Contents
Common issues with Netgear EX7700 extender installation
When attempting to install a Netgear EX7700 extender, consumers may run across a number of frequent problems:
- Incorrect placement of the extender can result in poor signal strength and connectivity issues during the Netgear EX7700 setup process.
- If the extension isn’t receiving power, it might not be able to connect to the network.
- Failing to enter the correct network credentials during Netgear EX7700 setup can lead to connection issues.
- Using an outdated firmware version can also cause problems during the Netgear EX7700 setup process.
- Inaccurate Netgear AC2200 setup of the extender’s settings can prevent it from properly connecting to the network.
- Interference from other wireless devices can cause signal interference and connectivity problems.
- Failing to properly reset the extender can cause issues with Netgear extender setup and connectivity.
- Connecting to the network may be problematic if the wireless protocols on the router are incompatible.
- Incomplete or incorrect installation of the Netgear EX7700 setup app can lead to errors during setup.
How to fix Netgear EX7700 Extender setup issues?
There are a few things you may attempt to troubleshoot the issue if you are experiencing problems setting up the Netgear wifi range extender:
- Verify that the extension has electricity and is turned on.
- Access the Netgear EX7700|AC2200 setup page through a web browser.
- Verify that the extender’s firmware is current.
- Set up the extender once more after resetting it to the factory defaults.
- Ensure that the extender is placed within the range of the main router’s network.
- Check if the extender is compatible with the main router’s network.
- Try changing the extender’s network name and password.
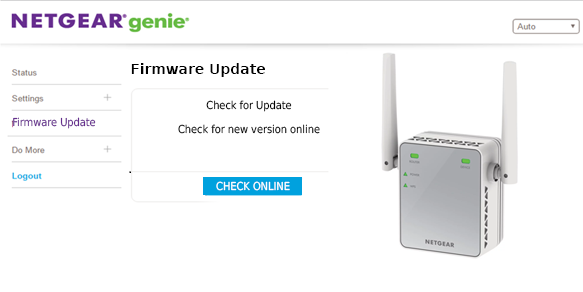
Netgear EX7700 WiFi extender firmware update
The Netgear EX7700 WiFi extender’s firmware can be updated to bring new features, security patches, bug fixes, and performance enhancements. It is advised to maintain your device’s firmware updated for maximum security and performance.
You can follow the instructions below to upgrade the firmware on your Netgear EX7700 WiFi extender:
- Connect your PC or mobile device to the extender’s WiFi network.
- Mywifiext.net should be entered into the address bar of any open web browser.
- Try using 192.168.1.250 if this doesn’t work.
- Enter the admin login information for your extender.If you haven’t changed them, the default username is “admin” and the default password is “password”.
- After selecting “Settings,” select “Firmware Update.”
- You will be given the option to download and install a new firmware version if one is available.
- To finish the firmware upgrade procedure, select this option and adhere to the on-screen directions.
- The extender will restart automatically when the firmware upgrade is finished.
This is how to update your Netgear EX7700’s firmware to the most recent version.
Netgear EX7700 WiFi Extender reset process
Resetting a Netgear EX7700 WiFi extender means returning it to its factory configuration. By doing this, the device’s configuration is cleared and its default settings are reinstated.
These steps can be used to reset the Netgear EX7700 WiFi extender:
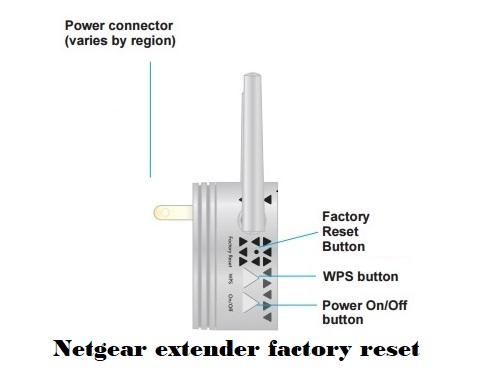
- Find the extender’s reset button.
- Press and hold the reset button for at least 5 seconds while using a paperclip or other tiny implement.
- Make sure you don’t let off of the button before the allotted time has passed.
- A power LED should first turn off before turning back on.
- This means that the reset procedure was successfully performed.
- Release the reset button at this point and wait for the extender to restart. This may take a few minutes.
- Once the extender has rebooted, you can set it up again by following the instructions in the user manual or using the Netgear installation assistant.
If you need assistance at any time, call us using our toll-free number or utilize our live chat feature.