The Netgear WN2500RP Extender is a device designed to extend the range and coverage of your existing WiFi network. Additionally, it assists in removing dead zones and offers a stronger and more dependable WiFi signal in previously inaccessible places. When it comes to Netgear WN2500RP setup, the process is relatively straightforward and can be accomplished using different methods. However, you can set it up using WPS (Wi-Fi Protected Setup) or opt for a manual configuration using mywifiext net.
Netgear WN2500RP Extender Manual setup
- On your computer or mobile device, go to your WiFi settings and connect to the default SSID of the extender.
- Open a web browser and enter mywifiext.net
- You will be directed to the Netgear Extender Setup page.
- Enter the default login credentials.
- You can either keep the same SSID and password as your existing network or set a new one for the extended network.
- Click Finish to apply the settings.
- The extender will reboot, and the setup process will be complete.
Remember that the setup instructions for your Netgear WN2500RP extender may differ slightly depending on the firmware version or model of your device. Additionally, the instructions provided here are only intended to serve as a general guide.
Therefore, for complete and specific instructions tailored to your device, it is always advised to consult our technical experts by calling at our toll free helpline +1-323-471-3045 or via live chat, They will help you to install your gadget.
Netgear WN2500RP setup using WPS Method
With the Netgear WN2500RP WiFi Range Extender, you can significantly enhance the performance and coverage of your current WiFi network. Additionally, Netgear WN2500RP setup through the WPS (Wi-Fi Protected Setup) configuration of the extender is a quick and straightforward method to establish a reliable and secure connection.
Follow the instructions below to Perform Netgear range extender setup using the WPS push button:
- Position the WN2500RP within the range of your existing WiFi extender and plug it into a power outlet.
- Wait for the extender to power up.
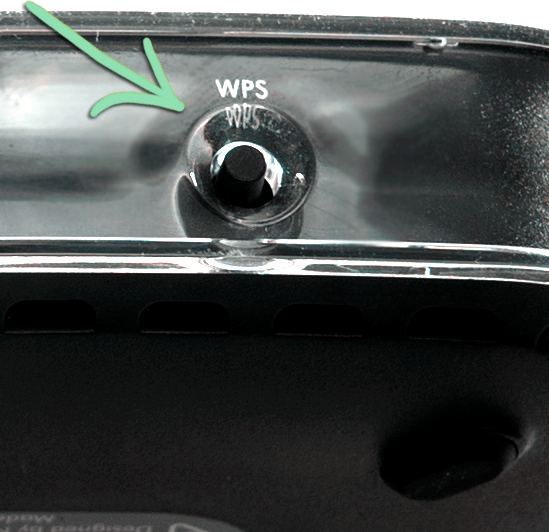
- Locate the WPS button on the side of the WN2500RP.
- Press and hold it for about 5 seconds until the WPS LED starts blinking.
- Within two minutes of pressing the WPS button on the extender, press the WPS button on your main extender for Netgear WN2500RP setup
- Once the connection is established, the WPS LED on the extender will turn solid green, indicating a successful connection.
Simply contact our team of highly qualified technical experts, who are available to help you anytime, anywhere, by phone at +1-323-471-3045 or by email at [email protected], for a hassle-free solution to all your technical problems.
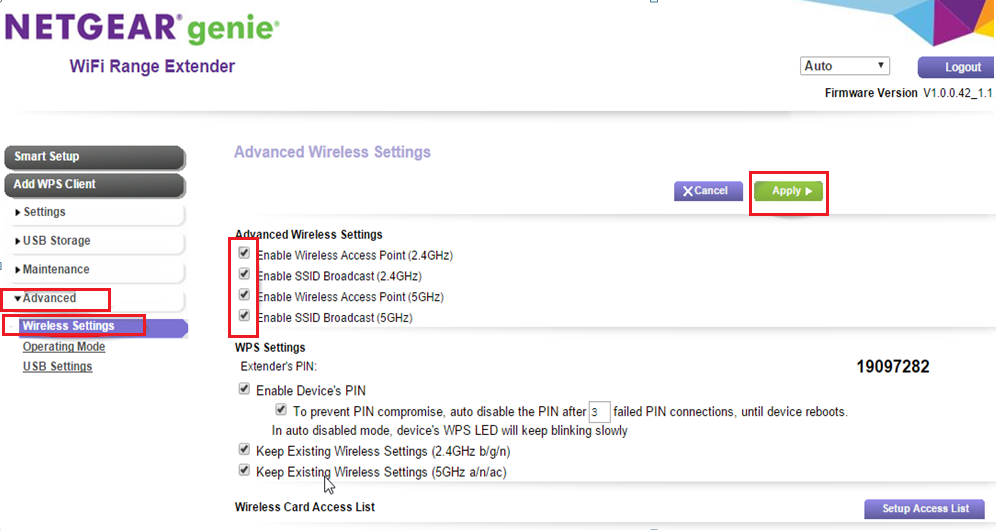
How to update Firmware Updates on Netgear WN2500RP?
Firmware updates play a crucial role in maintaining the performance, security, and functionality of the Netgear WN2500RP WiFi Range Extender.
- Download the latest firmware file to your computer.
- Ensure that your computer or mobile device is connected to the internet.
- A web browser should now be open. Type mywifiext.net into the address bar.
- If prompted, enter the extender’s login credentials.
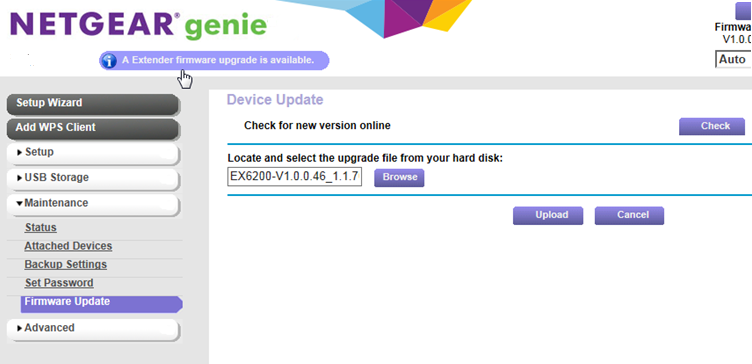
- Look for the Firmware update in the web interface.
- Choose the File button and select the downloaded firmware file from your computer.
- The firmware update procedure will then begin after you click Upload.
- It might take a while to update the firmware.
Note: During firmware updates on Netgear WN2500RP, it is crucial that you do not interrupt the power supply to the extender or turn it off. This can lead to potential firmware corruption or other issues.
Netgear WN2500RP reset using a web browser
Basically, reset is used when one has forgotten his or her login credentials. It can be performed either by soft factory reset or by hard factory reset. Here are the steps on how to perform a soft factory reset on your Netgear WN2500RP WiFi Range Extender.
Your extender’s settings will all be lost if you perform a soft factory reset, but the firmware won’t be modified. Take the following actions to perform a soft factory reset:
- Open a web browser and enter the Netgear extender default IP address in the address bar. Press Enter.
- You will be asked to enter the username and password for the extender.
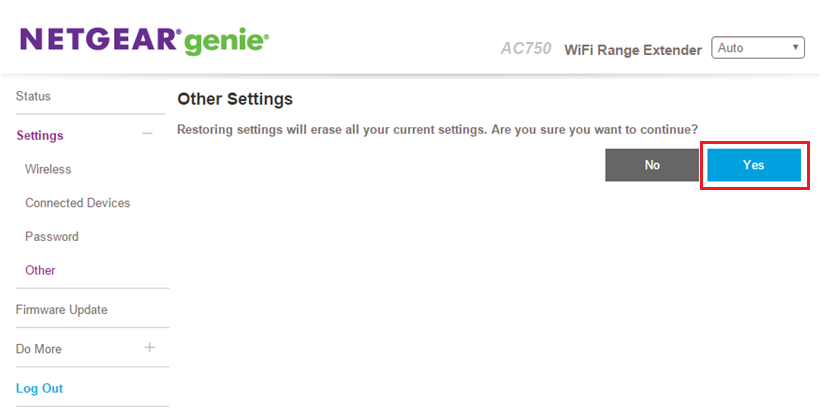
- After logging in, select “Settings” from the menu. Search for the “Reset” option.
- After the soft reset, your extender will restart.
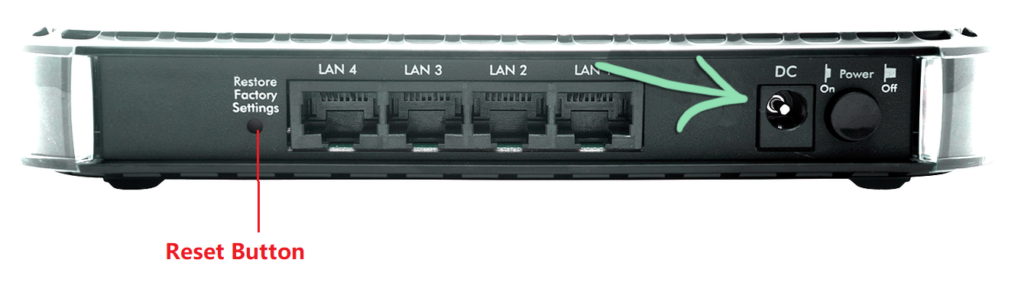
Netgear WN2500RP Hard Factory Reset
A hard factory reset will erase all of your extender’s settings. Listed below are the steps for performing hard factory reset:
- On the extender’s back, look for the Reset button.
- Press and hold the Reset button for about 30 seconds using a straightened paperclip or another small, pointed object.
- The Power LED will turn off after a brief period of amber blinking.
- The extender has undergone a factory reset.
Common issues of Netgear WN2500RP setup
Here are some common issues during Netgear WN2500RP setup. If you still face problems, feel free to call our technical experts at +1-323-471-3045 who are always ready to assist you.
- No Wi-Fi connection
- Extender is not detecting networks.
- Password Problems.
- Limited Internet access.
- Placement Challenges.
- Weak Signal.
- Configuration Page Access
- Setup Errors.
- Outdated Firmware.
Troubleshooting Netgear WN2500RP setup issues
- Ensure that the extender is placed within the range of your main WiFi extender.
- Avoid placing it in areas with interference or obstacles that may weaken the signal.
- Observe the LED indicators on the extender. They can provide valuable information about the device’s status.
- Check the user manual for the meaning of different LED patterns.
- Try restarting the extender and your main WiFi extender.
- If you encounter persistent issues, perform a factory reset on the extender.
- Follow the Factory Reset section in the previous response for instructions.
Say goodbye to dead zones and lagging connections – unleash the full potential of your network. Get connected like never before with Netgear WN2500RP setup.
If you still face difficulty just dial +1-323-471-3045 or an email to [email protected], you can get in touch with our team of highly qualified technical experts who are ready to help you whenever you need it.