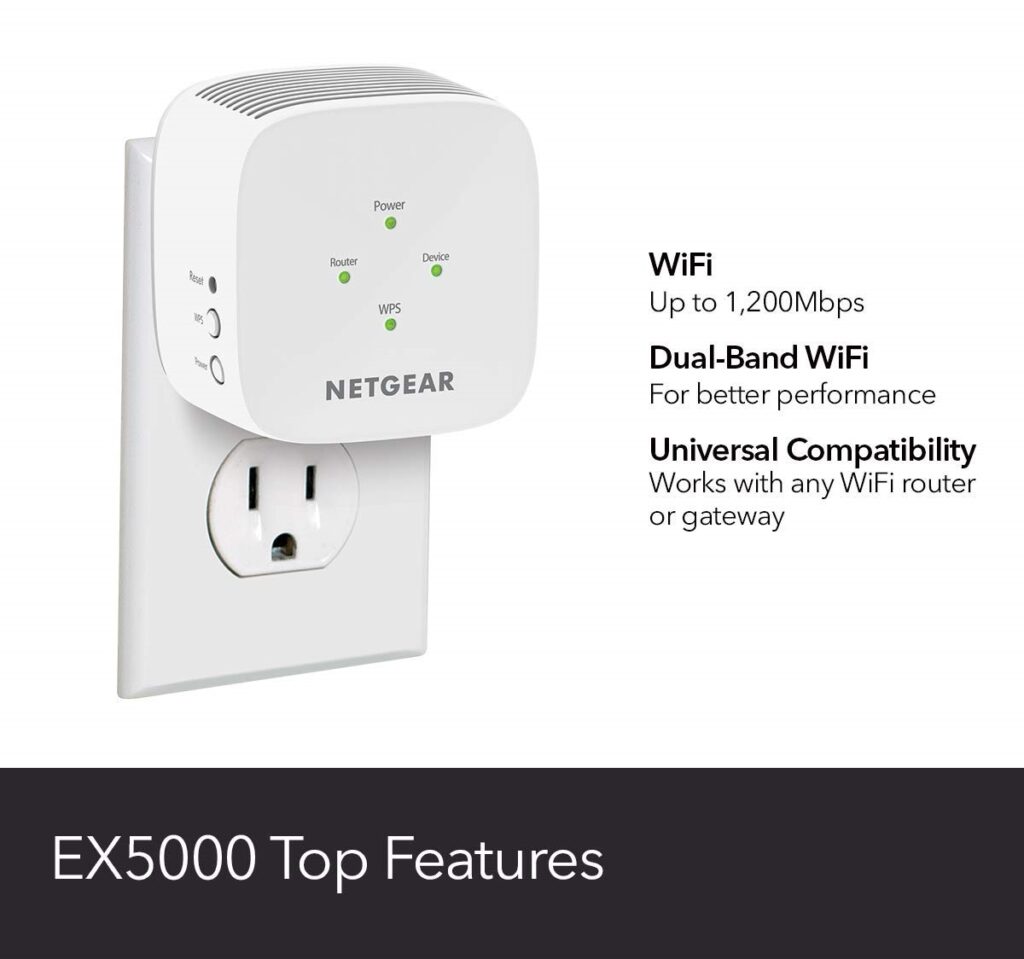
The Netgear EX5000 setup process is relatively straightforward and involves a few key steps to get your range extender up and running. The Netgear EX5000 is a powerful and reliable Wi-Fi range extender designed to enhance and extend the coverage of your existing wireless network. Whether you’re experiencing dead zones or weak signals in certain areas of your home or office, the Netgear EX5000 will help you boost your Wi-Fi range and provide a seamless internet connection throughout.
Before we start, ensure you have the following items prepared:
- Netgear AC1200 EX5000 Wi-Fi Range Extender.
- A web-browsing desktop, laptop, or mobile tablet.
- Your existing Wi-Fi network’s SSID (network name) and password.
- A stable internet connection.
Netgear EX5000 Setup via Manual Method
The Netgear WIFI Extender Setup through manual method will be successfully done if you follow the instructions in this guide.
To setup Netgear EX5000, follow the steps below:
- Plug the Netgear EX5000 into a power outlet near your Wi-Fi router.
- Use an Ethernet cable to connect the AC1200 to your computer or mobile device.
- Open a web browser and type mywifiext.net in the address bar.
- Follow the on-screen instructions to create a Netgear account or log in with existing credentials.
- Select “New Extender Setup” and follow the prompts to choose your Wi-Fi network and enter the network password.
- Wait for the extender to configure and connect to your existing Wi-Fi network.
- Once connected, move the extender to a location with weak Wi-Fi coverage but still within range of the router.
- Connect your devices to the new extended Wi-Fi network using the same Wi-Fi name and password as your existing network.
The Netgear EX5000 setup is now complete and ready to enhance your Wi-Fi coverage.
Netgear EX5000 WPS Setup
Our detailed instructions will enable you to complete a seamless setup process, whether your goal is to increase your WiFi range or get rid of annoying dead zones. Okay, so here’s a quick tutorial on configuring the Netgear EX5000 Setup using WPS:
- Plug the Netgear EX5000 into a power outlet near your Wi-Fi router.
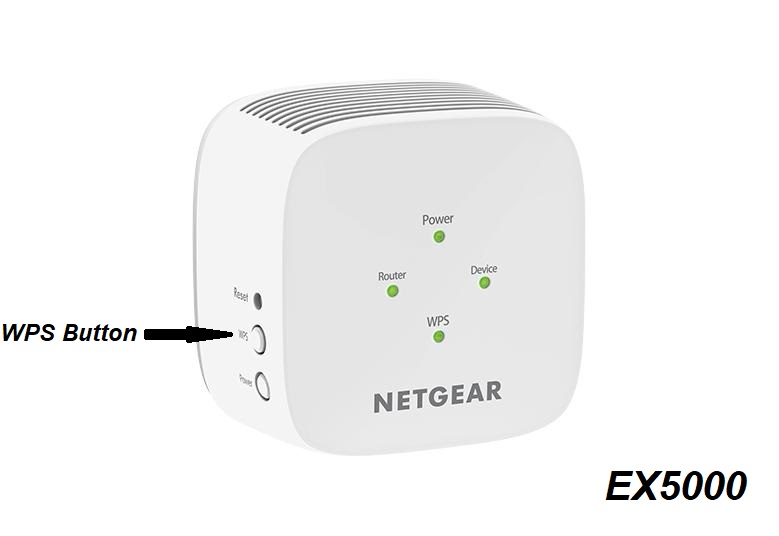
- Press the WPS button on your WiFi router within two minutes.
- Please press the WPS button on your Wi-Fi router within the next two minutes.
- Wait for the WPS LED on the extender to turn solid green, indicating a successful connection.
- Move the extender to a location with weak Wi-Fi coverage but still within range of the router.
- Now try to connect your device to the new extended WiFi Network in order to complete the Netgear EX5000 Setup.
Your Netgear EX5000 extender is now set up and ready to enhance your Wi-Fi coverage using the WPS method.
How to update the Netgear EX5000 Extender’s firmware?
Updating the Netgear Extender can be a crucial part of completing the Netgear EX5000 Setup. Sure, here’s a brief and straightforward guide on how to update the firmware of your Netgear AC1200 EX5000 Setup Extender:
- Log in to the Netgear WiFi extender and note current firmware.
- Get latest firmware from Netgear site.
- Connect device to Netgear extender’s network.
- Open browser, enter Netgear IP address i.e. 192.168.1.250.
- Use username/password.
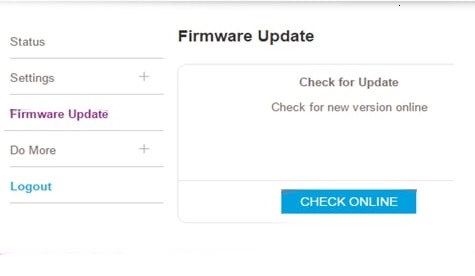
- Find “Firmware Update” under “Settings” or “Maintenance.”
- Choose the downloaded firmware file.
- Let update finish, may reboot.
- Reconnect devices to extender networks.
Remember, maintaining a stable connection during the update is crucial. Refer to official resources for details.
How do I reset the Netgear EX5000 WiFi Extender?
Resetting your Netgear AC1200 EX5000 while performing the Netgear EX5000 Setup can be the first step to a smoother, more dependable Wi-Fi experience, whether dealing with connectivity issues or looking for a fresh start.
To reset the Netgear EX5000 Wi-Fi range extender, follow these steps:

- Locate the reset button: Find the small reset hole on the back or bottom of the Netgear EX5000.
- Use a paperclip or pin: Straighten a paperclip or use a pin to press and hold the reset button.
- Hold the button: Press and hold the reset button for about 10 seconds until the power LED blinks.
- Release the button: After the LED blinks, release the reset button.
- Wait for reboot: The range extender will reboot and reset to its factory default settings.
- Reconfigure the extender: Access the Netgear EX5000 settings using the default login credentials, and reconfigure the device as needed.
After completing the reset process and performing the Netgear EX5000 Setup, Your Wi-Fi range extender will be ready to use with its default settings restored.
How to enable FastLane Technology on my Netgear EX5000?
The Netgear EX5000 Setup with FastLane Technology is your key to an improved Wi-Fi experience, whether you’re streaming HD content, playing online games, or just browsing the web.
Configure Netgear AC1200 EX5000 FastLane Technology for optimized dual-band Wi-Fi performance by following steps:
- Log in to extender’s settings by accessing the mywifiext net setup page.
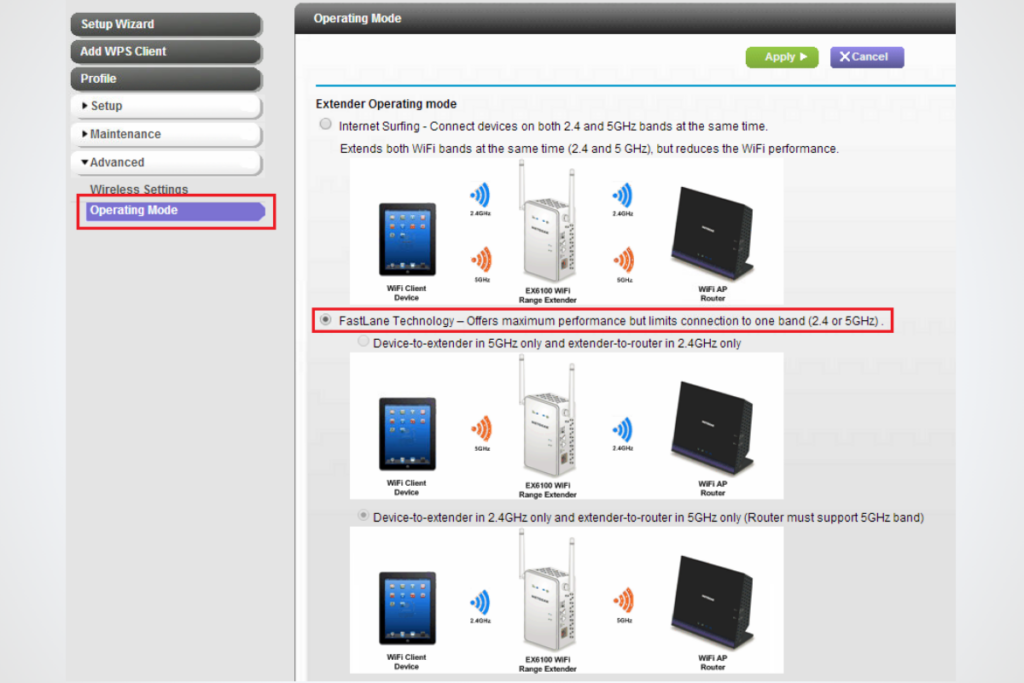
- Choose “FastLane” under “Wireless Settings.”
- Select “FastLane Technology” for 2.4GHz and 5GHz bands.
- Connect to extender’s new FastLane network for improved speed.
- Enjoy enhanced Wi-Fi performance without sacrificing coverage.
Elevate your online experience effortlessly with a Netgear AC1200 EX5000 FastLane setup.
Troubleshooting tips for Netgear EX5000 Setup Issues
Here are some common Netgear AC1200 EX5000 troubleshooting issues and their fixes:
- No Signal or Connection.
- Fix: Ensure the extender is powered on and placed within range of the router. Check if the extender’s LED lights are stable. If not, reset the extender and reconfigure the Netgear EX5000 setup.
- Slow or Unstable Connection.
- Fix: Verify the extender’s placement for optimal signal strength. Update the firmware to the latest version. Verify whether any other networks or devices are interfering.
- Can’t Access Extender’s Web Interface.
- Fix: Ensure you’re connected to the extender’s network. Try accessing the web interface using the IP address http://192.168.1.250/ instead of the web address.
- Password or Login Issues.
- Fix: Use the default username and password (admin/password). If changed, perform a factory reset to revert to defaults. Create a strong password to enhance security.
- Devices Not Connecting to the extender.
- Fix: Ensure correct network credentials are used. Restart the extender and devices. Verify if MAC filtering is disabled on the router.
Remember, these are general troubleshooting steps. If issues persist, consult our technical support specialists for specific and detailed assistance.