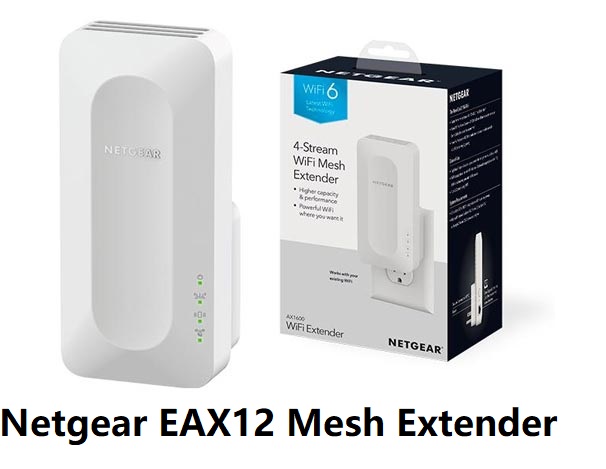
The Netgear EAX12 AX1600 WiFi Mesh Extender provides seamless coverage throughout your home or office. It can provide maximum speeds of up to 1.6 Gbps and a coverage area of 1200 square feet that minimizes interference and turns dead zones in your home or office into fun zones. It is compatible with any wireless router or any cable modem. After you’ve finished the Netgear EAX12 setup, you’ll be able to connect your devices to it. The best way to configure Netgear extender is just get in touch with our technical experts by dialing our toll free helpline +1-323-471-3045 or via live chat. They will help you to configure your wifi extender within just a couple of minutes.
Netgear EAX12 Extender Manual Setup
By using the manual configuration for the Netgear Extender and carefully following the provided instructions, users can extend the range of their WiFi. In order to successfully improve wireless connectivity, the extender must be powered and its settings must be set up.
Here are some important steps that help you to do the Netgear EAX12 setup:
- Plug in your EAX12 and power it on.
- Put your router and Netgear eax12 extender in the same space.
- Open a web browser on a smart device.
- Then go to mywifiext.net.
- You can see the Netgear installation page on your screen.
- Enter your username and password to proceed to the next step.
- To finish the setup process, follow the prompts.
- You have successfully finished the setup process if the LEDs on your EAX12 turn solid green.
Now your Netgear eax12 setup is complete, you may improve Wi-Fi coverage across your house or workplace by removing dead spots and guaranteeing a stable internet connection. This is a result of manual setup.
Netgear EAX12 Setup via WPS button
The WPS setup is the easiest way to setup the netgear extender. It’s a straightforward process. You don’t need any type of username or password. With the help of WPS setup, users can set up their Netgear extender within a couple of minutes. To configure a Netgear extender, you don’t need a password or account of any kind.
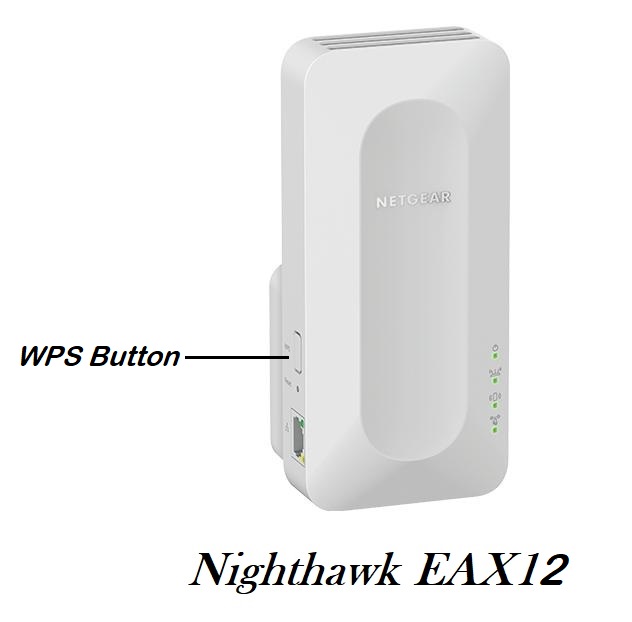
For the Netgear EAX12 Setup WPS Method, please follow the given instructions:
- Power on your Netgear EAX12 extender.
- The extender should be placed close to the existing router.
- After that, the power LED turns solid green.
- Find and press the WPS button on the Netgear EAX12 until
- Also, press the WPS button on the normal WiFi device.
- Wait until the LED on your extender turns solid green.
- Now the installation process is complete.
In this way, you can easily set up your Netgear EAX12 via Wireless Protected Setup (WPS). If you’re facing any issue related to the setup, then contact our professional experts via toll free number or live chat; they will help you.
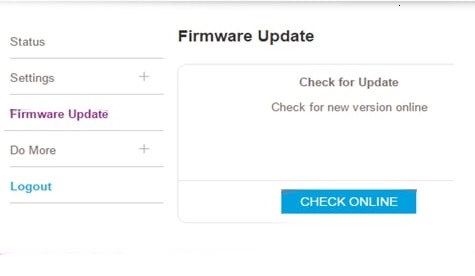
Netgear EAX12 Firmware Update
Firmware update refers to the process of installing the latest version of a firmware file that comes with new security features and other new features provided by Netgear from time to time. After updating the Netgear EAX12 firmware, you will be able to fix bugs and also increase the performance of your Netgear EAX12.
To update the Netgear EAX12 firmware, follow these steps:
- Turn on your Netgear EAX12.
- Take any Wi-Fi compatible smart device.
- Open any Internet browser and access the mywifiext net login page.
- Log in to your Netgear EAX12 by entering custom details.
- Open Settings, and then tap Firmware Update.
- Do not disconnect your AX1600 while the update process is in progress.
In this way, you can update to the latest firmware version and enhance the performance of your extender.
How to reset the Netgear EAX12 Extender?
In most cases where a user has forgotten their password and wishes to recover it, performing a factory reset is the necessary operation. It’s important to note that the Netgear eax12 reset process is the only solution, but you should remember that this process will completely erase your previous settings.
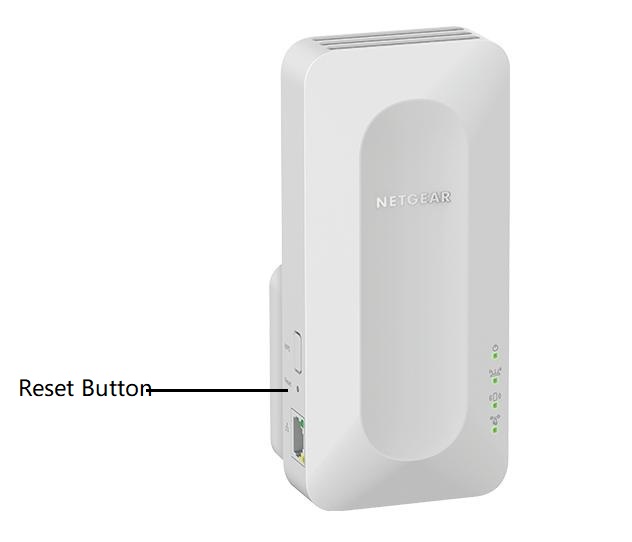
Here are the steps to reset the Netgear EAX12:
- Locate the reset button on the WiFi extender. The reset button is on the side panel of the extender.
- Press and hold the reset button for at least 5-8 seconds while using a paper clip or pointed pin.
- Keep holding onto the button until the specified period of time has gone.
- Before being switched back on, a power LED must be turned off.
- This proves that the reset procedure worked as intended.
- Now release the reset button and watch for the extender to resume.
- Keep your extender plugged in because it can take a while for this to finish.
Now you can complete the Netgear EAX12 reset process. If you need assistance regarding Netgear EAX12 setup, you can contact us at our toll free number +1-323-471-3045 or through live chat. Our technical team is always there to assist you at any time.
Common Issues during Netgear EAX12 Setup
Following are a few typical setup-related problems with the Netgear EAX12 extender:
- Incorrect mywifiext password.
- The Netgear Genie app doesn’t open.
- Issues while accessing 192.168.1.250 IP address.
- WiFi connectivity issues.
- Forgot the extender’s default password?
- Extender’s LED lights are not stable.
- Mywifiext.com doesn’t open.
- Unable to update the firmware?
- MAC address filtering errors
- I can’t find the extender network name.
- The netgear extender red light is causing issues.
- Unable to perform the extender reset process.
- The Internet is connected but not working.
Troubleshooting Steps for Netgear EAX12 Setup issues
Here are the troubleshooting steps for the Netgear EAX12 setup:
- Ensure the extender is powered on and connected to a working power outlet.
- Place the extender midway between your router and the area with weak Wi-Fi signal.
- Press and hold the reset button for 7 seconds to reset the extender to factory settings, if needed.
- Confirm that your router supports WPS (Wi-Fi Protected Setup) and that it’s enabled.
- Press the WPS button on the extender, and within 2 minutes, press the WPS button on your router.
- Check the LED lights on the extender for a solid connection to the router.
- Visit Netgear’s website to download and install the latest firmware for the extender.
Keep these steps in mind to troubleshoot any issues during the setup of your Netgear EAX12 extender. If you still having any issue regarding your Netgear wifi extender you can contact our technical team by dialing +1-323-471-3045 or also via live chat.