The Netgear AX1750 Setup is a robust process that can improve your current WiFi signal strength and reach inaccessible sections of the home. The Netgear AX1750 works flawlessly when streaming HD movies and playing online games when connected to any regular WiFi extender. You are in the proper location if you’re Looking for the Netgear AX1750 Setup guidelines. In this article, we’ll go over the hassle-free technique for Netgear wifi extender login. We also go over some details on firmware updates so you can utilize the gadget correctly and benefit from it to the fullest. So let’s get going!
To finalize the Netgear AX1750 Setup Manually, you must use a web browser to reach its web-based setup page, and after that follow these steps:
- Connect your Netgear AX1750 4 Stream Wifi 6 Mesh Extender to a power outlet near your existing WiFi router.
- Connect your PC or mobile device to the default WiFi network of the extender.
- Please open a web browser and input “mywifiext.net” or “192.168.1.250” into the address field.
- If prompted, follow the on-screen instructions to create a Netgear account.
- Choose your current Wi-Fi network and, if necessary, enter the password.
- Click “Next” to finish the configuration.
- After connecting, move the extender to a location with a poor Wi-Fi signal for optimal coverage.
Your Netgear AX1750 setup is complete and ready to use. Connect your devices to the Wi-Fi network using the SSID and password you configured earlier.

Netgear AX1750 Setup Using the WPS Method
Setting up a Netgear AX1750 Wi-Fi extender with WPS (Wi-Fi Protected Setup) is a quick and simple way to expand your existing Wi-Fi network. The following are the instructions for Netgear AX1750 Extender Setup Using WPS:
- Connect the Netgear AX1750 extender near your router and turn it on.
- For a few seconds, press and hold the WPS button on your extender until the WPS LED starts blinking.
- Within two minutes, please push the WPS button on your router.
- Wait for the WPS LED on the extender to turn solid green, which indicates a successful connection.
Your Netgear AX1750 Setup is finished and ready to use. Remember to keep the default password secure and change it to a strong one to enhance your network’s security.
Netgear AX1750 Firmware update
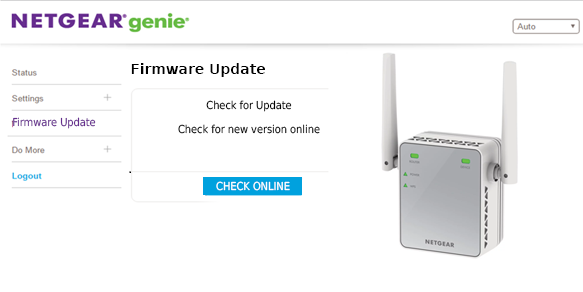
Firmware updates for your Netgear AX1750 4 Stream Wifi 6 Mesh Extender are required to keep the device functioning smoothly, securely, and with the most recent features and upgrades. The following is a general guide to updating the firmware on your Netgear AX1750 WiFi extender:
- Turn on your AX1750 by plugging it into an electrical socket.
- Launch an updated web browser on a smart device.
- Enter “mywifiext net” into a web browser to access the Netgear extender’s web interface.
- Log in with your Netgear account information.
- Please go to the settings menu to check for available firmware upgrades.
- If an update is available, please download and install it by following the on-screen instructions.
Before beginning the firmware upgrade procedure, make sure your WiFi extender is turned on and linked to your existing WiFi network.
How do I perform a Factory Reset on the Netgear AX1750 Extender?
If you are having trouble configuring your extender or wish to start afresh, you may need to do a factory reset. Here are full instructions for conducting a factory reset on a Netgear AX1750 extender:
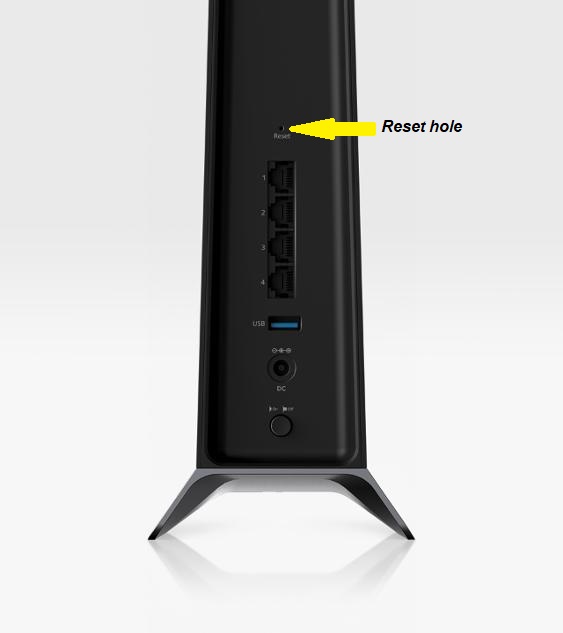
- Locate the reset button (typically a small hole) on your Netgear AX1750 extender.
- Insert a paperclip or a pin into the reset hole and keep it there for 5–10 seconds, or until the LED lights flash.
- Remove your finger from the reset button.
- The extender will restart and revert to its factory settings.
Keep in mind that if you reset your extender, your previous settings will be lost. Before you reset your extender, make a backup.
Troubleshooting steps for Netgear AX1750 Setup issues
If you are facing issues with your Netgear AX1750 setup, follow these troubleshooting steps to resolve common problems:
- Place the extender centrally, away from obstacles.
- Restart the extender after unplugging it.
- Check for a solid green power LED.
- Connect to “NETGEAR_EXT” Wi-Fi with the default password.
- Access setup at “http://www.mywifiext.net/” or “http://192.168.1.250.”
- Verify the “Connected” status on the main router.
- Update firmware if it is available on the Netgear website.
- Factory reset if problems persist (hold the reset button for 10 seconds).
- Reconfigure using the setup wizard.
- Ensure correct main router Wi-Fi settings.
- Optimize Wi-Fi channels using an analyzer tool.
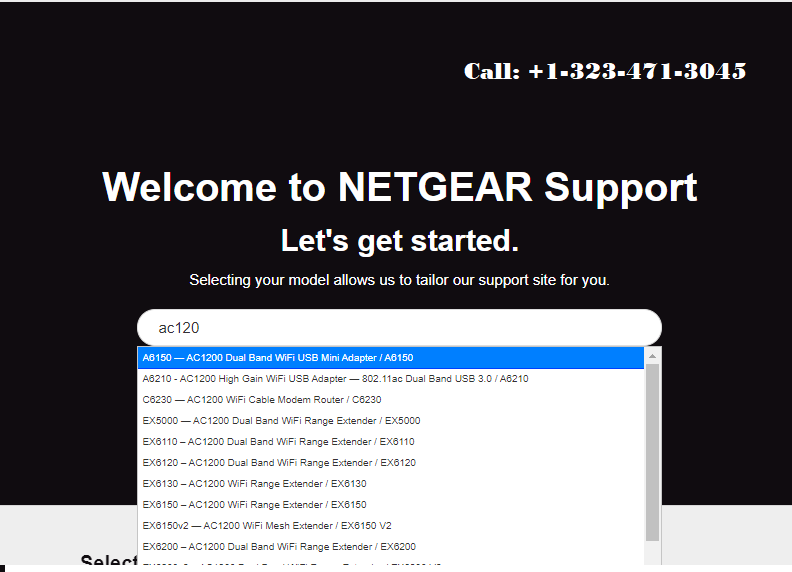
- Contact Netgear support if issues persist.
Remember, every Wi-Fi environment is unique, and various factors can affect the performance of your extender. By following these steps, you should be able to troubleshoot and resolve the most common setup issues with your Netgear AX1750 extender. If you have any issues with your extender, you can contact our toll-free number (+1-323-471-3045) or email: [email protected]