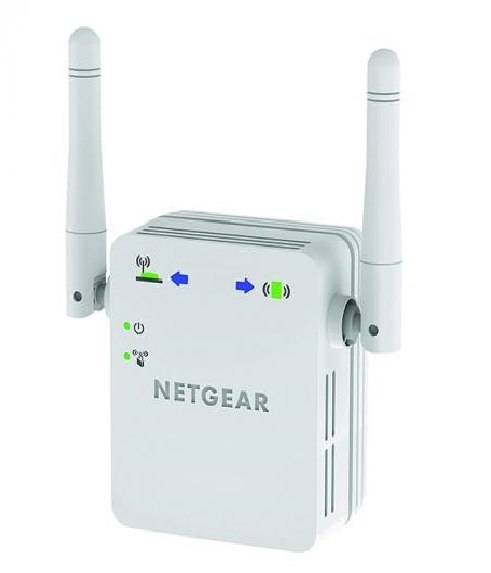
The Netgear N300 setup is the most effective technique to increase the wireless signal strength of your current network. The N300 can assist, regardless of whether you’re having trouble with dead zones or simply want to increase your coverage. We will walk you through the Netgear wifi extender login process step by step in this tutorial.
How to configure Netgear N300 extender Manually?
Use a web browser for access to the extender’s web-based configuration page in order to manually configure a Netgear N300 extender. The following are the manual Netgear N300 setup instructions:
- Wait for the power LED to turn completely green after plugging in your Netgear Extender.
- Connect to the “NETGEAR_EXT” network in your WiFi settings on your PC or mobile device.
- To proceed, open a browser and enter “mywifiext” or “192.168.1.250” into the address bar.
- If prompted, create a Netgear account by following the instructions displayed on the screen.
- Choose your current Wi-Fi network and enter the password if necessary. To finish the setting process, please click “Next”.
- After you’ve connected, relocate the extender to a spot with weak Wi-Fi for greater coverage.
- Your WiFi coverage should have improved now that the manual Netgear N300 setup is complete.
You have manually set up the WiFi settings on your Netgear N300 extender. The WiFi coverage in your home or office should now be better as a result.
Netgear N300 Setup using WPS Method
With the Netgear N300 WiFi Range Extender, you can significantly boost the functionality and coverage of your present WiFi network. In addition, setting up the Netgear N300 with the extender’s WPS (Wi-Fi Protected Setup) configuration is a quick and easy approach to creating a reliable and safe connection.
For the Netgear N300 Setup via WPS method, follow these steps:
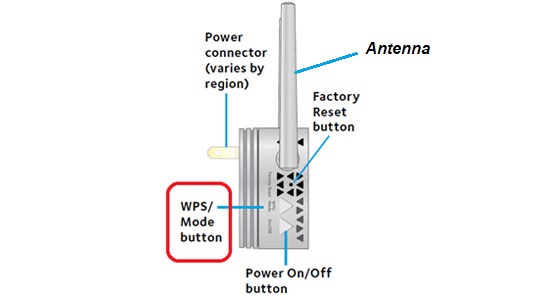
- Connect your extender to an electrical outlet.
- Put your extender next to your WiFi router.
- Watch for the Netgear N300 power LED to turn green.
- On the extender, click the WPS button.
- Press or hit the same WPS button on your current router as well after a little interval.
- The WPS LED on the extender becomes completely green when the connection is successful.
The Netgear N300 setup using the WPS technique has been successfully finished. If you have any issues or need help with your extender, please contact our technical expert at our toll-free number +1-323-471-3045
Netgear N300 Extender Firmware Update
The Wi-Fi extenders regularly receive firmware updates to increase security, correct issues, and maintain compatibility with more recent gadgets. For the best performance and security, it’s essential to keep your firmware updated.
Follow the following steps to upgrade the firmware on your Netgear N300 extender:
- You can turn on your N300 by plugging it into a power supply.
- Launch your mobile device’s most recent web browser.
- In a web browser, enter “mywifiext.net” to reach the Netgear extender’s mywifiext net setup web interface.
- To access the account, please enter the information from your Netgear account.
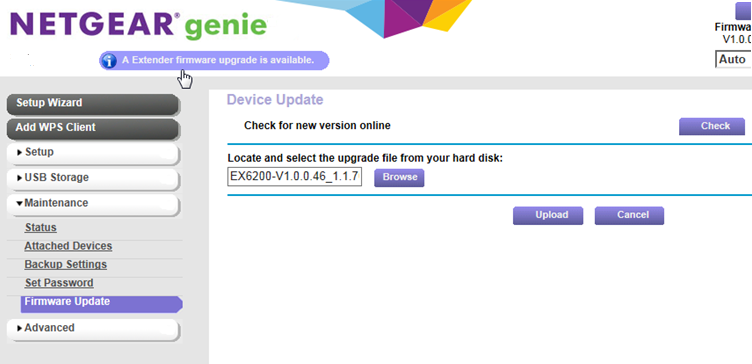
- Please check the settings menu for any firmware upgrades that are available.
- Please follow the instructions displayed on the screen to download and install any updates that are available.
Before starting the firmware upgrading process, ensure that your WiFi extender is active and connected to your current WiFi network.
How to perform reset on Netgear N300 Extender?
Resetting the device returns it to its factory settings, which is useful for resolving setup errors or fixing persistent problems. In basic terms, a person carries out a factory reset when they want to regain access to something after forgetting their login credentials.
The Netgear N300 extender reset procedures are as follows:
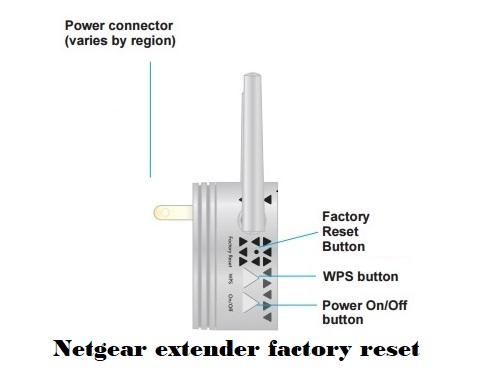
- On your Netgear N300 Extender, find the reset button, which is generally a little hole.
- You can use a paper clip or pin to press and hold the reset button for at least 10 seconds.
- Once the power LED has started blinking, release the reset button.
- You must set up your extender from scratch after a factory reset. Be sure to back up your configuration before resetting.
Remember that if you reset your extender, your previous setup will be erased. Create a backup before you reset your extender.
Troubleshooting steps for Netgear N300 Setup
The Netgear N300 extender is designed to enhance Wi-Fi coverage and eliminate dead zones in your home. However, like any technology, it can encounter issues that may impact its performance. This guide provides a comprehensive overview of troubleshooting steps and ensures a seamless network experience.
- Make sure the extender is connected and receiving power.
- Confirm it’s within the range of the router and connected to the network.
- Check the LED lights on the extender. A solid green light indicates a good connection.
- Perform a factory reset if facing issues. Utilize a paperclip to press and hold the reset button for a duration of 10 seconds.
- Place the extender midway between your router and the area with poor Wi-Fi coverage for optimal signal strength.
- Ensure the extender has the latest firmware. Visit Netgear’s official website for updates.
- Check for interference from other electronic devices. Change the extender’s channel to avoid congestion.
- Ensure your devices are compatible with the 2.4GHz frequency, which N300 extenders usually operate on.
- Activate Quality of Service (QoS) settings to prioritize bandwidth for specific applications or devices.
- If issues persist, contact Netgear support for specialized assistance.
The issues were not fixed by any of the troubleshooting solutions provided. Call our toll-free number +1-323-471-3045 to talk with a technical professional if you are experiencing any extender-related issues.