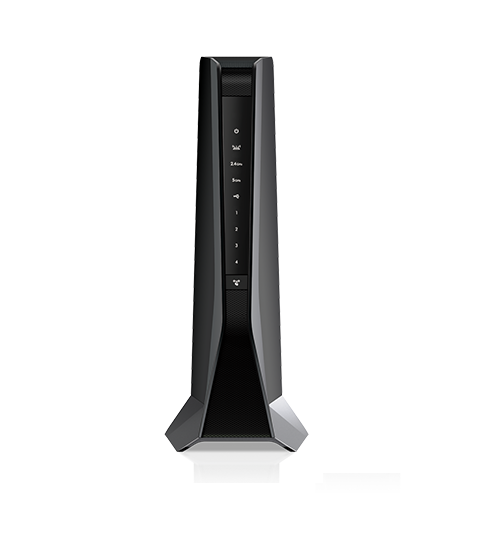
The Netgear EAX20 is a WiFi range extender designed to enhance and extend the coverage of an existing WiFi network. Netgear wifi extender set up is the process that helps eliminate dead zones and weak signal areas in your home or office, allowing you to enjoy a stronger and more reliable WiFi connection throughout your space. The Netgear EAX20 setup refers to the process of configuring and installing the Netgear EAX20 WiFi range extender to amplify and extend the coverage of an existing WiFi network.
Netgear EAX20 Setup Via Manual Setup
Netgear EAX20 Setup using the manual setup process involves connecting to the extender’s default WiFi network, accessing the extender’s settings through a web browser, and configuring the extender with your existing WiFi network details.
Here’s a step-by-step guide for manual setup:
- Put the Netgear EAX20 extender in the same room.
- Plug the extender into a power outlet and wait for the power light to turn solid white.
- Now, take any smart device.
- Open a web browser like Chrome.
- Type 192.168.1.250 or mywifiext.net in the browser’s address bar.
- Use “admin” as the username and password.
- The setup wizard’s on-screen instructions should be followed.
- Move the extender to a good spot for better coverage.
Now your extender is set up and working, extending your WiFi network. If you face any issues, consult the extender’s manual or contact us via call or live chat.

How to Configure Netgear EAX20 by WPS?
Netgear EAX20 Setup using WPS (Wi-Fi Protected Setup) involves a simple and quick process. WPS allows you to connect the extender to your router without the need to type in the Wi-Fi password. Here’s a step-by-step guide:
- Place the Netgear EAX20 where it can get a good Wi-Fi signal from your existing router.
- By connecting it to an outlet, you can turn it on.
- Press and hold the WPS button on the extender for 2-3 seconds until the WPS light blinks.
- Within 2 minutes, press and hold the WPS button on your router for 2-3 seconds.
- The extender’s WPS light will blink rapidly while connecting to the router. This may take a few minutes.
- When connected, the WPS light on the extender turns solid green.
- Move the extender closer to the router if needed for better coverage.
Once the Netgear EAX20 is successfully set up using WPS, it will extend your Wi-Fi network, providing improved coverage in the desired areas.
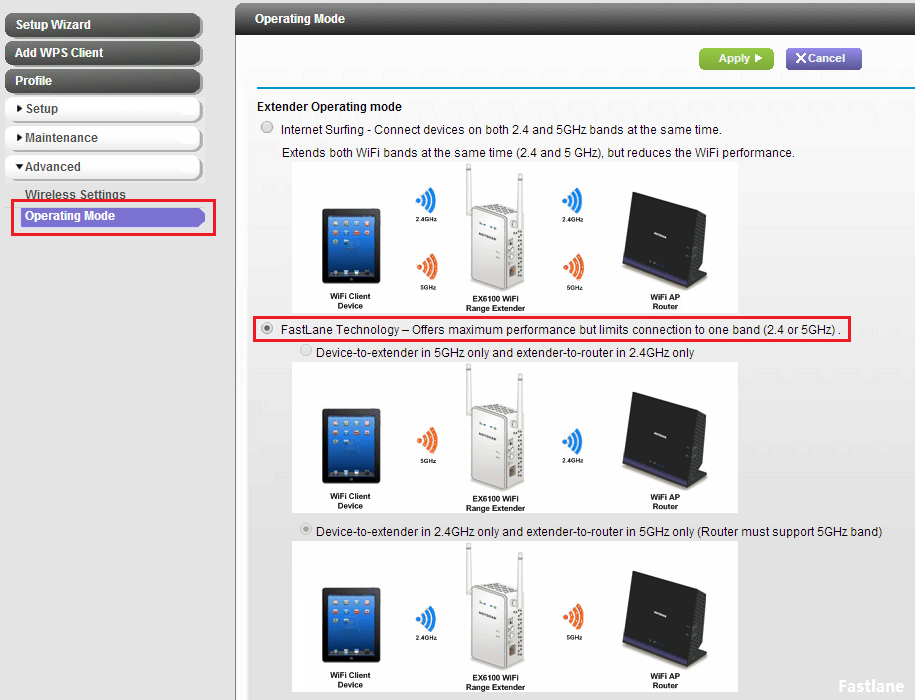
Netgear Nighthawk EAX20 Fastlane Setup
The Netgear Nighthawk EAX20 is a WiFi range extender that supports a feature called “FastLane.” FastLane technology allows you to use both WiFi bands to establish one super high-speed connection. This can be useful if you want to prioritize speed over coverage.
Here’s how you can set up FastLane on your Netgear Nighthawk EAX20:
- Plug the Nighthawk EAX20 into a power outlet.
- Connect to its WiFi network using the SSID and password found on the extender’s sticker.
- Open a web browser.
- Go to mywifiext.net.
- Use the default username “admin” and password “password,” or your updated credentials if changed.
- Navigate to the WiFi or wireless settings section.
- Look for FastLane settings and enable them.
- Choose the bands you want to use for FastLane.
- Configure FastLane settings by selecting the source WiFi network and entering passwords if required.
- Save the changes and wait for the extender to reboot.
- Once rebooted, reconnect your devices to the newly extended WiFi network.
Your Netgear Nighthawk EAX20 should now be set up with the FastLane feature, providing a boosted, high-speed connection using the selected WiFi bands.
Common Issues during Netgear EAX20 Setup
During the Netgear EAX20 setup, you may encounter some common issues. The following is a list of potential issues and their fixes:
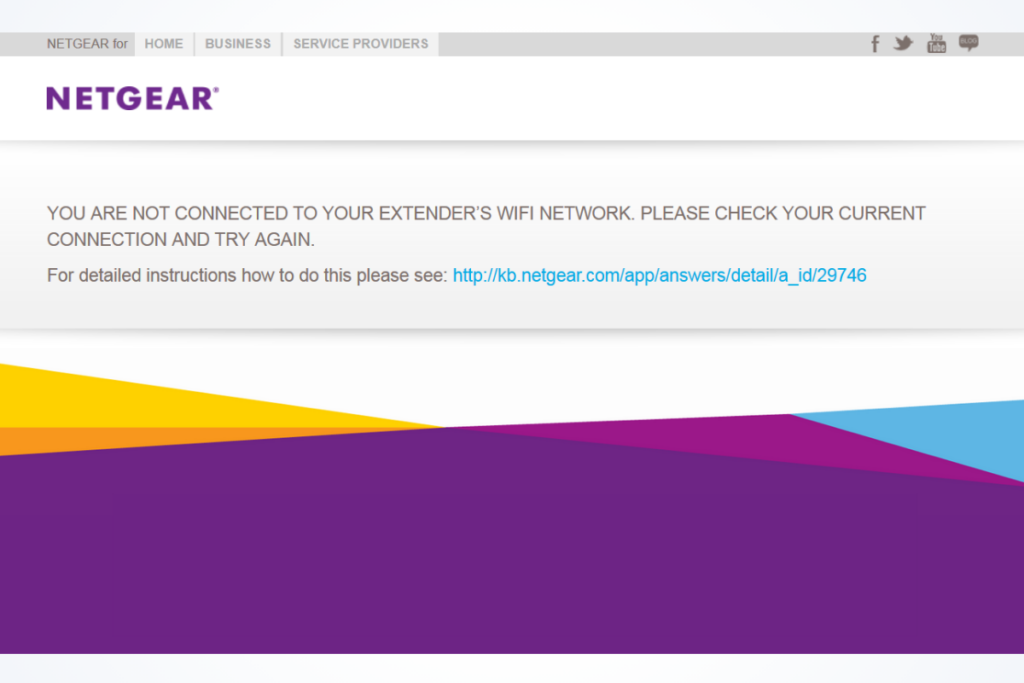
- WiFi extender is connected but no internet.
- Can’t connect to mywifiext.local
- Netgear genie app doesn’t open.
- Issues while accessing Netgear wifi extender IP address.
- WiFi connectivity issues.
- Forgot the extender’s default password?
- Extender’s LED lights are not stable.
- Mywifiext.com doesn’t open.
- WiFi extender not connecting to the internet.
- I can’t find the extender network name.
- The Extender is not working properly.
- Netgear extender red light causing issues.
- Unable to perform the extender reset process.
If you encounter persistent issues during the Netgear EAX20 setup,contact us via tollfree or live chat.
Troubleshooting steps For Netgear EAX20 Setup
If you encounter issues during the setup of your Netgear EAX20 extender, follow these troubleshooting steps to address common problems:
- Make sure the extender is properly plugged in and getting power. Check for loose connections.
- Turn off the extender and your setup device, then turn them back on after a minute.
- Use a paperclip to press and hold the reset button for 10 seconds. This resets the extender to factory settings.
- Double-check and match the Wi-Fi network name (SSID) and password with your main Wi-Fi.
- Move the extender closer to your main router for a stronger Wi-Fi signal.
- Ensure your devices support the Wi-Fi bands (2.4GHz or 5GHz) used by the extender.
- Install the latest version of the Nighthawk app from your app store.
- Access extender settings via web browser, check for firmware updates, and update if available.
- If setup fails, redo the process following on-screen instructions.
- Turn off VPN or proxy on your device during setup, as they can interfere.
- In your device settings, clear cache and data for the Nighthawk app.
- Keep the extender away from electronic devices to avoid signal interference.
Always ensure you follow the setup instructions carefully, and if problems persist,contact us via call or live chat.