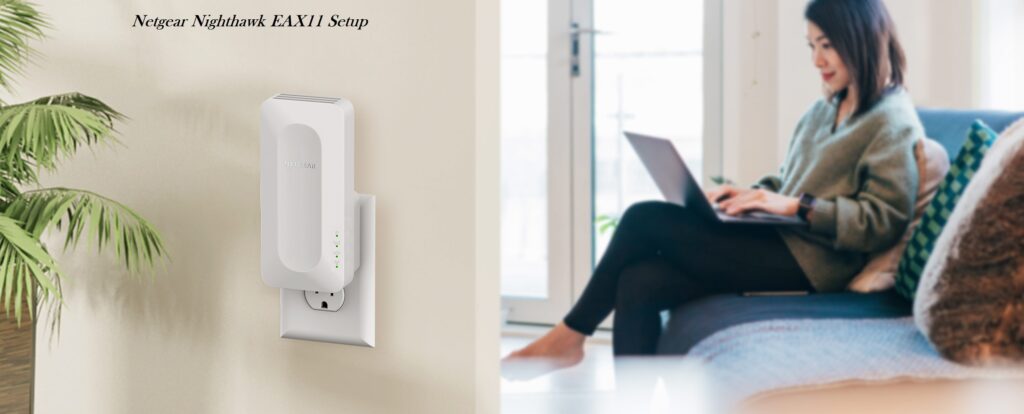
Configuration process for the Netgear EAX11 can now begin. But before we start the Netgear EAX11 Setup, let’s educate ourselves about the Netgear EAX11 4-stream extender. It can swiftly expand your wireless network thanks to its dual-band technology. You will be able to extend your network even to dead zones in your home or place of business once you have finished the Netgear EAX11 Setup.
High speed internet is provided with the Netgear range extender setup. You may get speedy WiFi performance and dual-band AC WiFi from it. Your present router’s Netgear WIFI extender establishes a Fastlane connection.
What is Netgear EAX11?
A Wi-Fi range extender from the Netgear EAX11 AX1600 is made to improve and broaden the reach of your current wireless network. In comparison to previous Wi-Fi standards, it runs on the most recent Wi-Fi 6 (IEEE 802.11ax) standard, offering faster speeds and better performance. The EAX11 supports both 2.4GHz and 5GHz frequencies simultaneously thanks to its dual-band capabilities, providing a combined Wi-Fi speed of up to 1200Mbps. With no lag or buffering, you can connect several devices and stream high-definition content.
A strong and reliable connection is guaranteed throughout your house or business thanks to the extender’s two high-performance internal antennas and beamforming technology, which helps direct Wi-Fi signals towards connected devices.
Netgear EAX11 Specifications
- WiFi Standard 802.11ax.
- WiFi dual-band technology.
- 4 concurrent streams.
- Compatible with any cable modem or WiFi router.
- A single Ethernet port with auto-sensing capabilities.
- WiFi-6 is quick, reaching 1.8Gbps.
- Backwards compatible with WiFi 5, WiFi 4, and earlier WiFi device generations.
- Continuous smart roaming.
Netgear EAX11 Manual Setup|AX1600
Netgear EAX11 extender manual setup involves configuring your extender’s settings manually, typically by accessing its web interface to connect to your existing WiFi network and customize preferences for optimal performance.
The steps for setting up a Netgear EAX11 Extender are as follows:
- Turn on your EAX11 by plugging it into a power outlet.
- Your home router should be located close to AX1600.
- Wait for the power LED to give a stable green light.
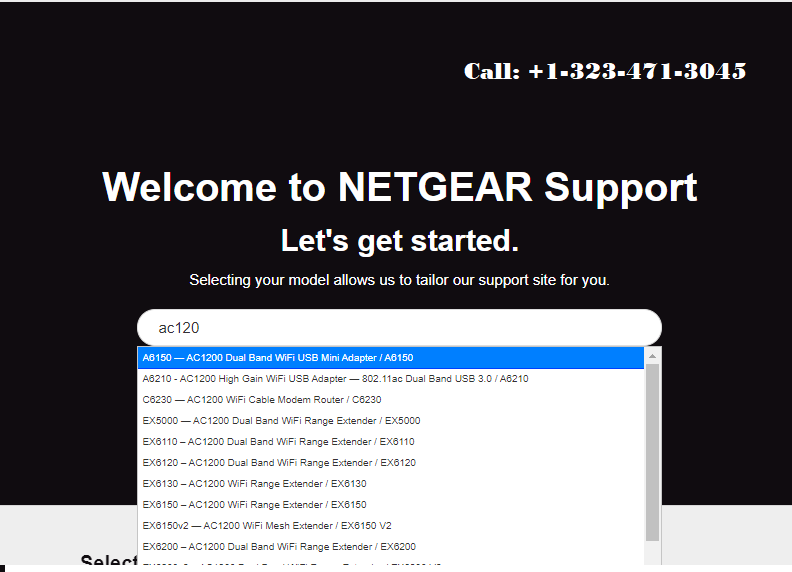
- On a web browser type www mywifiext net and hit the enter key.
- The Netgear Installation Assistant window will open.
- Follow the instructions displayed on the screen.
- If you see all stable led lights on the extender, it means the setup Netgear EAX11 process has been completed successfully.
- Place the AX1600 in the ideal area where you wish to extend the network after unplugging it.
You’ve successfully finished the manual Netgear EAX11 setup process.
Table of Contents
Netgear EAX11 Setup Using WPS Method
Using the WPS is the simplest method for configuring an EAX11 range extender. WiFi Protected Setup is abbreviated as WPS. Your router needs to have a WPS button on it in order to support this method.
To perform Netgear EAX11 Extender WPS Setup follow the given steps below:
- Connect your Netgear EAX11 to a power source.
- Ensure that the AX1600 is located close to the current router.
- Wait until the power LED turns stable green.
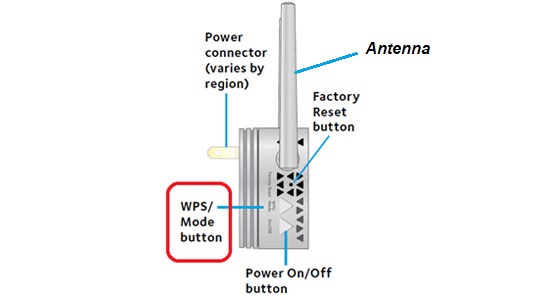
- Locate the WPS button on your EAX11 and press it
- Press the router’s WPS button also.
- When all of the lights turn solid green, the Netgear EAX11 setup process is finished.
In two minutes, you can set up your Netgear Nighthawk AX1600 device by WPS in this manner. If you still have issues with Netgear EAX11 Setup, then contact our expert.
Netgear EAX11 firmware update
Even after a successful Netgear EAX11 setup procedure, has your Nighthawk AX1600 started acting strangely or is it not providing the required speed? If so, you must follow the firmware update process, which includes additional security features in addition to other benefits. The faults and other problems that a user could have when using the extender will be resolved once the Netgear Nighthawk EAX11 firmware upgrade has been completed.
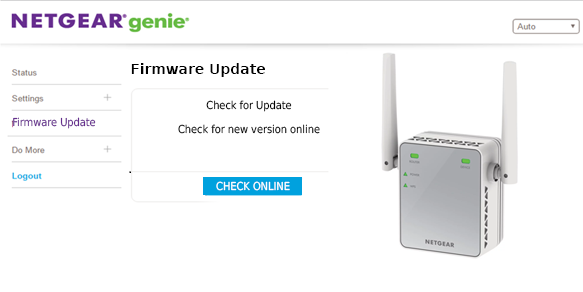
Here are the steps for Netgear EAX11 Extender firmware update:
- Turn on your Netgear AX1600 Extender.
- Pick up any mobile device with wifi, such as a laptop, desktop, or smartphone.
- Open any web browser and type www.mywifiext.net and then hit the enter key.
- The screen will show the Netgear login window.
- Enter your login information.
- After selecting settings, select firmware upgrade.
- Don’t switch off your AX1600 while the update is running.
That’s how you may update your EAX11’s firmware to the most recent version and resolve any problems.
Netgear EAX11 Setup Common issues
Common problems that users may encounter during Netgear EAX11 extender setup include:
- Mywifiext.net is not working.
- Password for mywifiext not correct.
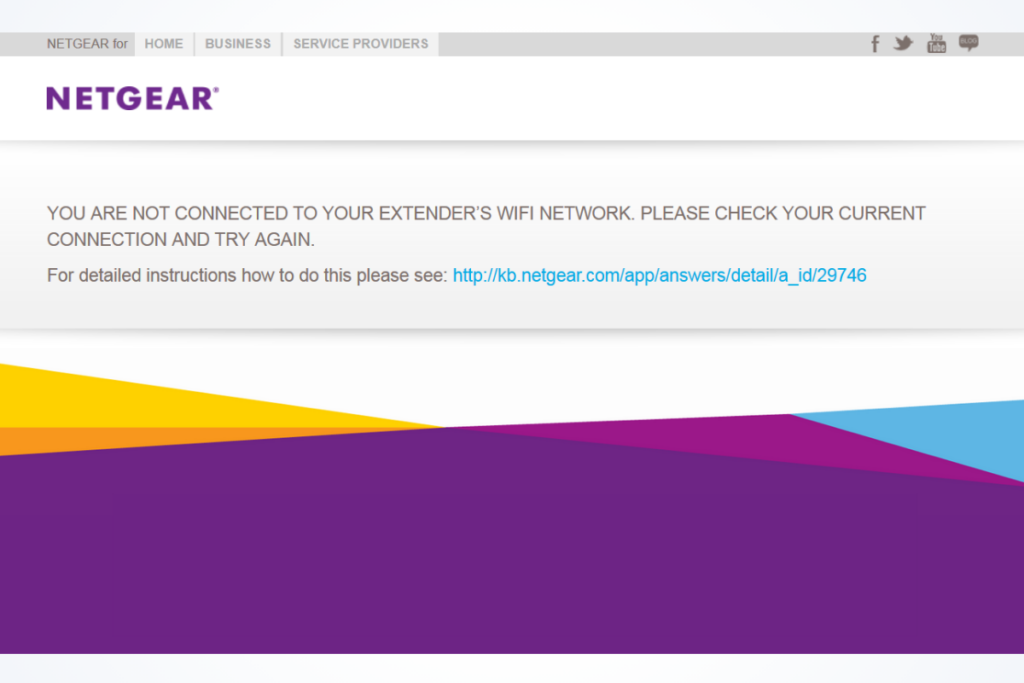
- WiFi extender is not connected to the network.
- Cannot connect to mywifiext.local.
- Problems getting the 192.168.1.250 IP address when trying to browse.
- WiFi connection problems.
- Forgot the default Netgear extender password.
- The LED lights on the extender are unstable.
- Mywifiext.com won’t launch.
- Netgear extender loses internet access and won’t let you login.
- Updating Netgear firmware is not possible.
- EAX11 failing upgrade, not functional.
- Internet connection issues with WiFi extenders.
- No network name for Netgear range extenders.
- Extender from Netgear not working.
Troubleshooting tips for Netgear EAX11 Setup issues
To resolve Netgear AX1600 setup difficulties, follow the troubleshooting procedures outlined below:
- Check that the Netgear EAX11 extender is receiving adequate power from the wall outlet.
- Check to ensure that the wall plug into which the extender is plugged is not damaged or shorted out.
- Use your device to connect to a high-speed internet connection.
- Examine all of the wiring connections. Use any broken cable at your own risk.
- If you’re having problems using www mywifiext net EAX11, make sure you’ve put the right URL in the address box.
- Reboot your Netgear extender and try to set it up again.
- During mywifiext.net login, only use the most recent version of your web browser.
- Update the Netgear firmware on your extender to the most recent version.
- Restore the extender to its original factory settings.
None of the troubleshooting suggestions resolved your problem? Don’t freak out. Simply contact us to resolve your Netgear EAX11 extender setup concerns.
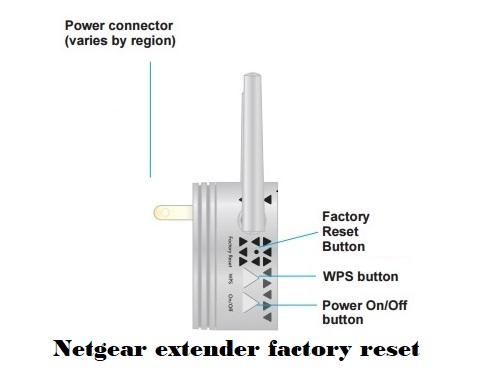
How to reset Netgear EAX11 AX1600?
It can happen that a user forgets their username or password. The factory reset procedure is the best method for getting it back. The Netgear Nighthawk EAX11 will be reset, erasing all of your personal information (password, username, SSID, etc.), and preparing your AX1600 for the new configuration procedure. You’ll need a paper clip or a pen to reset your EAX11.
Follow these instructions to reset a Netgear Nighthawk EAX11:
- Turn on your Netgear EAX11 Extender.
- Take a pen or a paperclip.
- On the side panel of the extender, you can see the reset button.
- With the help of a pen press the reset button for 8-10 seconds.
- Your EAX11 will reboot within a minute, at which point the new installation process can begin.
That is a really simple method for resetting your extender. By calling our toll-free number or chatting live with us, you can get in touch with us if you continue to experience issues with your extender. Our technical support team is available to help you at any time.