The Netgear AX1600 setup will enhance the functionality and coverage of your current wireless network. Additionally, the AX1600 eliminates dead spots and increases WiFi range, ensuring a steady and dependable internet connection throughout your house or office.
Moreover, thanks to the extender’s straightforward setup procedure, which makes it simple to connect and configure. Your WiFi experience will be significantly improved. As a result, you’ll enjoy better signal strength, faster speeds, and seamless connectivity.
Here are the steps mentioned below to configure your Netgear Nighthawk AX1600 wifi range extender:
- Connect the wifi extender to the power outlet.
- Watch for the power LED to turn green.
- Connect to the extender’s WiFi network using your computer or mobile device.
- Enter mywifiext.net into the address bar of a web browser once it is open.
- It will display the page for new extender setup.
- Follow the on screen instructions to finalize the Netgear wifi range extender setup.
A hassle-free solution for all your technical troubles with just a simple phone call at +1-323-471-3045, you can connect with our team of highly skilled technical experts who are ready to assist you anytime, anywhere.
Netgear AX1600 setup using WPS button
Using the Wi-Fi Protected Setup (WPS) button, you can quickly and securely connect your Netgear AX1600 WiFi range extender. There is no need to grab any smart device or any username and password in order to complete the Netgear Nighthawk AX1600 Setup.
Here are some steps for Netgear AX1600 extender setup:
- Connect the extender to an electrical outlet.
- Watch for the Power LED to turn green before taking any action.
- Press the WPS button on the side panel of the extender.
- Press the same WPS button on the side panel or on the backend of your existing router.
- Once the connection is made, the extender LEDs will become completely green.
- It indicates that the connection between your Nighthawk extender and the wifi router has been successfully established.
By following the above mentioned simple steps you can setup your Netgear AX1600 4-Stream WiFi 6 Mesh Extender within just 2-4 minutes.
Table of Contents
How to update firmware on Netgear Nighthawk AX1600?
Firmware updates for the Netgear AX1600 are undeniably essential, as they bring crucial improvements and enhancements to the extender’s performance and security. Moreover, these updates act like software upgrades for the device, effectively fixing bugs, enhancing WiFi stability, and adding new features to enrich the overall experience.
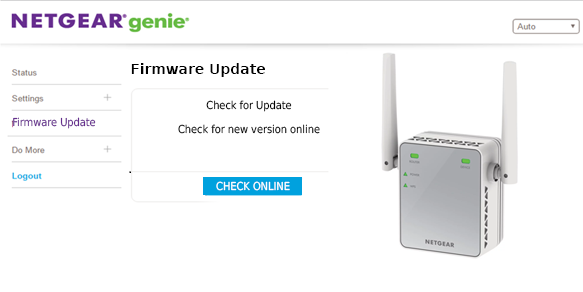
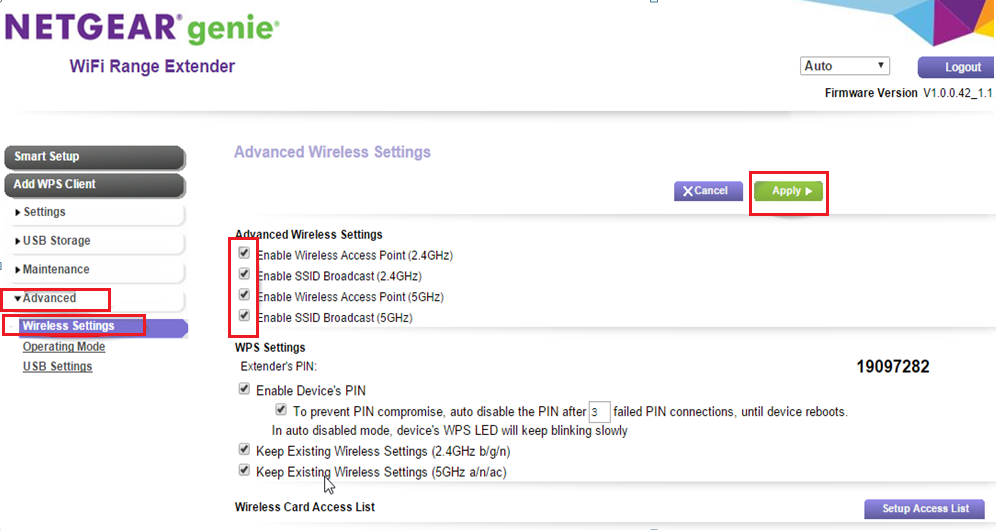
Here are the simple steps to execute a firmware update on Netgear AX1600 4-Stream WiFi 6 Mesh Extender:
- Look up the most recent firmware version on the extender’s web interface.
- To access the extender’s web interface, go to mywifiext.net.
- From the “Administration” or “Settings” menu, choose “Firmware Update”.
- Once the firmware file has been uploaded, click “Apply” or “Upload.”
- The extender will automatically reboot after the update.
In case, If your extender is behaving weirdly or it is not providing the desired internet speed even after a successful firmware update then you have to perform a factory reset operation on your wifi extender.
The Netgear AX1600 extender’s performance can be significantly enhanced by resetting it. It is also helpful when you are attempting to access something again after forgetting your login information. You have the option of performing a hard or soft factory reset.
Netgear AX1600 reset using a web browser
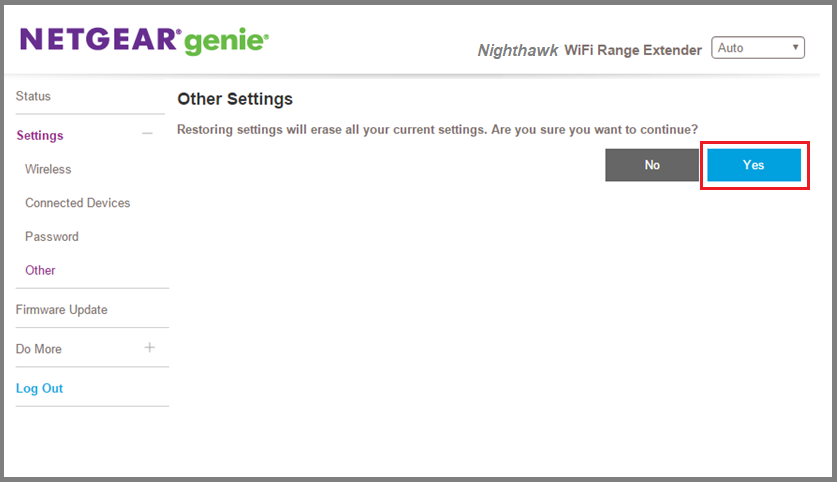
A soft factory reset will erase all of your extender’s settings, but it will not change the extender’s firmware. To perform a soft factory reset, follow these steps:
- Ensure that your computer or mobile device is connected to your Netgear extender’s network.
- Open a web browser and enter the Netgear extender default IP address of your extender in the address bar. Press Enter.
- You will be asked to enter the username and password for the extender.
- After logging in, select “Settings” from the menu. Search for the “Reset” option.
- After the soft reset, your extender will restart.
Netgear AX1600 Hard Factory Reset

A hard factory reset will erase all of your extender’s settings and firmware. These steps should be followed to perform a hard factory reset:
- Locate the Reset button on the back of the extender.
- Use a straightened paperclip or other small, pointed object to press and hold the Reset button for about 30 seconds.
- The Power LED will blink amber for a few seconds, and then it will turn off.
- A factory reset has been performed on the extender.
After a factory reset, you must set up your Netgear AX1600 extender once more.
Common Netgear AX1600 Extender Issues
The Netgear AX1600 extender works well, but it occasionally encounters a few common issues.The following are some typical problems that you might run into with your Netgear AX1600 setup:
- There are no WiFi signals coming from the WiFi extender.
- The extender’s WiFi signal is not very strong.
- The extender has no internet connection. Check your extender’s internet connection.
- It seems impossible for you to access the extender’s settings. Before attempting to access the extender’s settings, verify your IP address.
Try the Netgear AX1600 setup troubleshooting advice if you are experiencing any of these issues. You can get assistance from our technical experts if you still need help.
Troubleshooting Netgear AX1600 setup Connection Issues
Troubleshooting Netgear AX1600 setup connection issues can be straightforward with these steps:
- Make sure the LED lights are stable and the extender is turned on.
- Check the location of the extender. It should be freely accessible .
- Check to make sure the router and extender are both connected with the proper Wi-Fi passwords.
- Avoid placing metal and electronic devices close to the extender to lessen interference.
- To reduce interference, use different Wi-Fi channels for the router and extender.
- For better performance, make sure the extender has the most recent firmware release.
- For troubleshooting purposes, temporarily disable the extender’s guest network.
- Perform a factory reset and reset the extender’s configuration if problems continue.
These procedures can help you troubleshoot and fix Netgear AX1600 connection problems and guarantee a dependable and stable Wi-Fi connection. Say good-bye to shaky connections and hello to a bigger, more dependable, and more productive wireless network with the help of the Netgear AX1600 WiFi range extender.